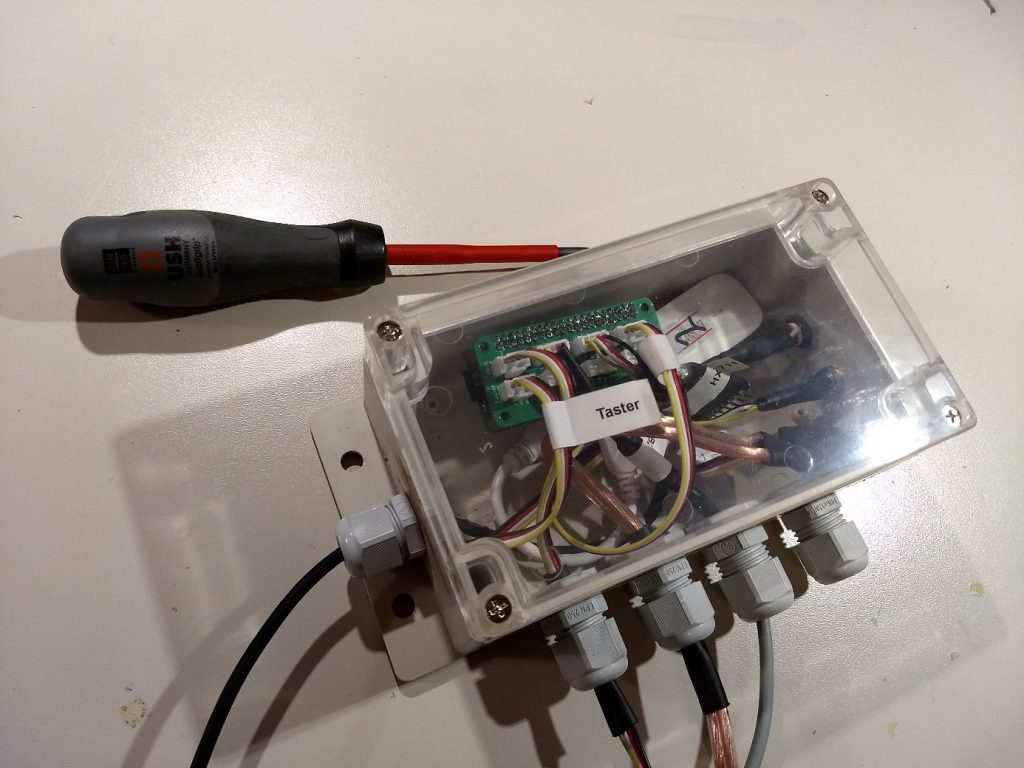
type 158x90x65mm clear waterproof plastic
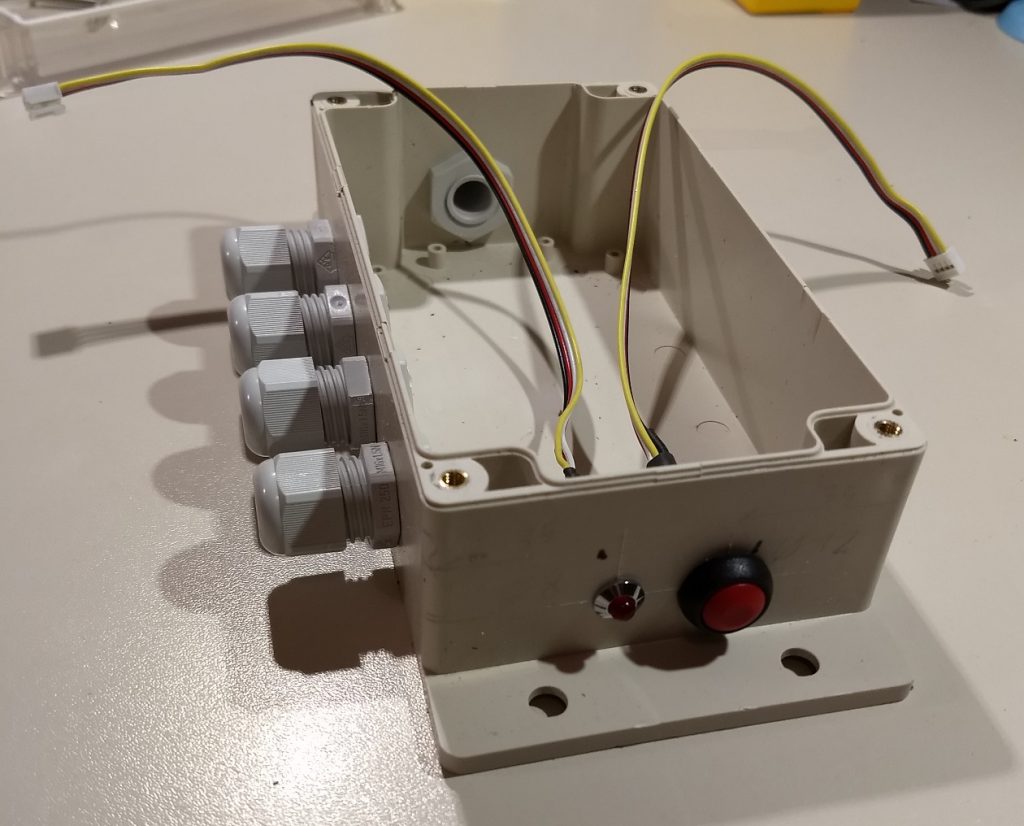
That’s what it looks like when it’s done:
Re 1: Total material costs for electronics with me approx. 64€ (+ possibly resulting forwarding expenses)
| Prize | Amount | Sum | Type | |||
| 15,50 € | 1 | 15,50 € | Raspi Zero | reichelt | Raspberry Pi Zero WH v.1.1, 1 GHz, 512 MB RAM, WLAN, BT | |
| 3,95 € | 1 | 3,95 € | SD-Card 4GB | reichelt | MicroSDHC-Speicherkarte 4GB – Intenso Class 10 | |
| 10,00 € | 1 | 10,00 € | Surf Stick | Amazon | gebraucht | Huawei E3531 SurfStick |
| 2,00 € | 1 | 2,00 € | micro USB to A jack cable | reichelt | USB 2.0 Kabel, Micro B Stecker auf A Buchse, 0,1 m | |
| 0,79 € | 1 | 0,79 € | Socket connector for adapter board | reichelt | Buchsenleisten 2,54 mm, 2X20, gerade | |
| 1,00 € | 1 | 1,00 € | Adapter board empty (unassembled) from China | china | Siehe Kapitel 3 | |
| 1,50 € | 1 | 1,50 € | Grove plug for PCB (10pcs) | reichelt | Arduino – Grove Universal-Buchse, 4-Pin (10er-Pack) | |
| 3,43 € | 1 | 3,43 € | am2320 Temp-sensor with Grove plug with housing | ebay | AM2320B Digital Temperatur und Humidity Sensor modul SHT21 AM2301 | |
| 0,02 € | 3 | 0,06 € | 10k pull-up resistor for AM2320 (best SMD 0805) | reichelt | 3st bestellen falls zwei runterfallen | SMD-Widerstand, 0805, 10 kOhm, 125 mW, 1% |
| 8,00 € | 1 | 8,00 € | DS18B20 Sensor with Grove connector | mouser | seed 101990019 | |
| 2,22 € | 1 | 2,22 € | HX711 circuit board | Amazon | china | HX711 Module Weighing Sensor |
| 1,10 € | 1 | 1,10 € | Shrink tubing 4mm with hot melt adhesive | reichelt | Schrumpfschlauch mit Innenkleber, Ø4,0mm | |
| 4,81 € | 1 | 4,81 € | Waterproof junction box – SODIAL(R) Waterproof kalr Plastic cover Electronic junction box 158x90x60mm | Amazon | CHINA | Wasserdichte Anschlussdose |
| 1,39 € | 1 | 1,39€ | SODIAL(R) 3A/3V-250V push button push button push switch 16mm nickel-plated brass | Amazon | CHINA | 3A/3V-250V Drucktaster Taster |
| 0,91 € | 1 | 0,91 € | LED for housing installation | reichelt | LED, bedrahtet, 5 mm, rot, Außenrefl., Ø8 mm, 15 mcd, 50° | |
| 0,03 € | 1 | 0,03 € | 330Ohm resistor for LED | reichelt | Dünnschichtwiderstand, axial, 0,6 W, 330 Ohm, 1% | |
| 1,60 € | 1 | 1,6 € | 330Ohm resistor for LED | reichelt | Schrumpfschlauch mit Innenkleber, Ø8,0mm | |
| 0,22 € | 5 | 1,10 € | Cable glands M16 (unit price approx. 0.2€) Nut for cable gland unit price approx. 0.1€) | reichelt | Metrische Kabelverschraubung, 4,5 – 10,0 mm, M16, grau | |
| 0,07 € | 5 | 0,35 € | Cable glands M16 (unit price approx. 0.2€) Nut for cable gland unit price approx. 0.1€) | reichelt | Metrische Gegenmutter für MBF 16, M16, grau | |
| 3,70 € | 1 | 3,70 € | 5St. 50cm Grove Kabel 5er Pack | reichelt | Arduino – Grove Universal-Kabel, 4-Pin, 50cm, fixiert (5 St.) |
Under https://www.reichelt.de/my/1554810 I have also created a shopping cart, which contains all articles mentioned. For the table see the end of the article.
Under https://www.reichelt.de/my/1554814 only the articles are contained, which I needed for a stick balance. So none that are included in the parts list with optional/alternative.
Mounting into the housing
Empty case (undrilled) bought on ebay for approx. 6,50€
Delivery time from China approx. 3 weeks!
First, drill the holes in the LED/button housing and the M16 cable glands.
For indication I use a height gauge (Amazon ca 45€). But it also works with a scale (0€).

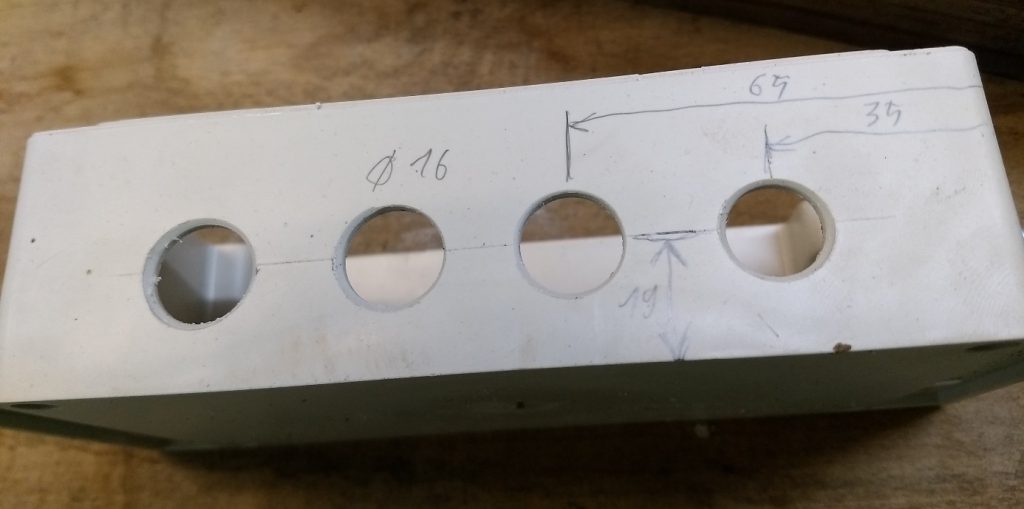
Here are the positions of the holes for the M16 cable glands
Later this side will be installed on the long side towards the inside of the car.
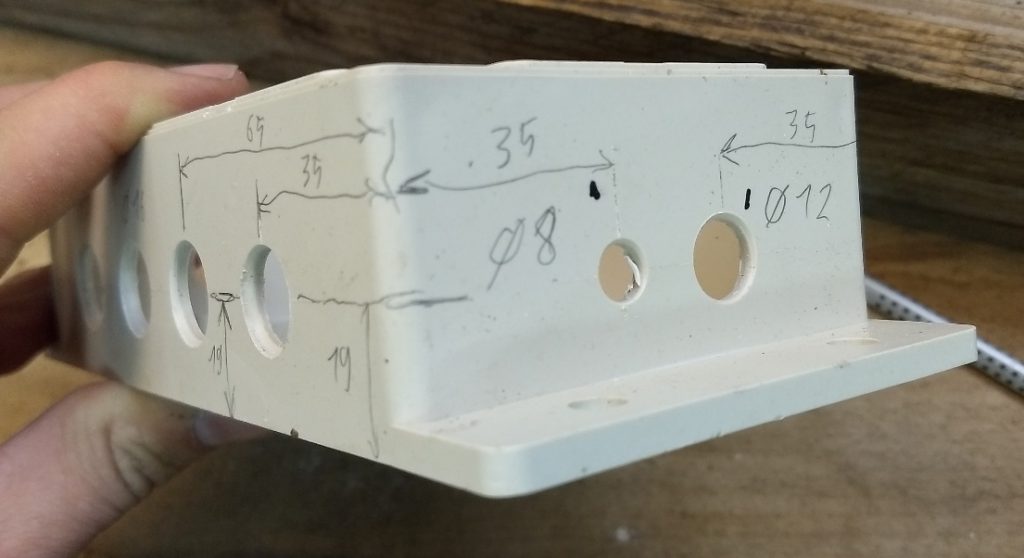
Drill holes for buttons (Reichelt approx. 4€) with 12 mm and LED socket (Reichelt approx. 1€) with 8mm on the underside.
The Sodial button from Amazon in China (about 3€ cheaper than the Reichelt button) needs a hole with 16mm diameter.
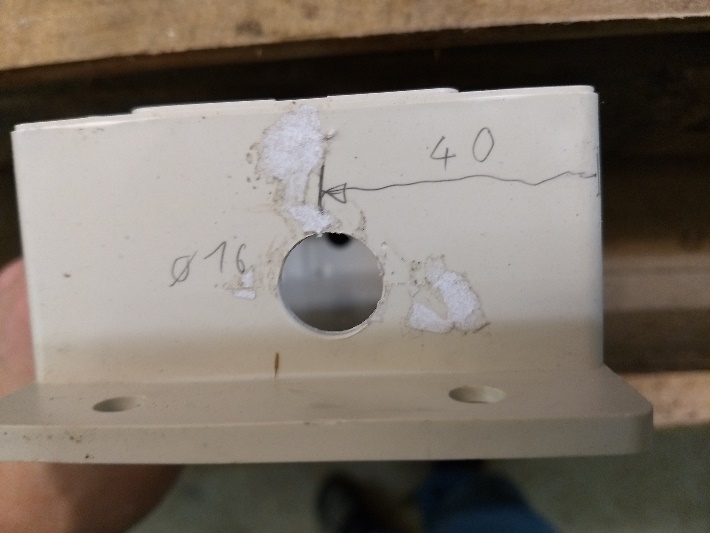
Drill another reserve cable gland on the top side, e.g. for a USB cable.
Pre-drill holes, e.g. with a 3mm HSS spiral drill at high speed.
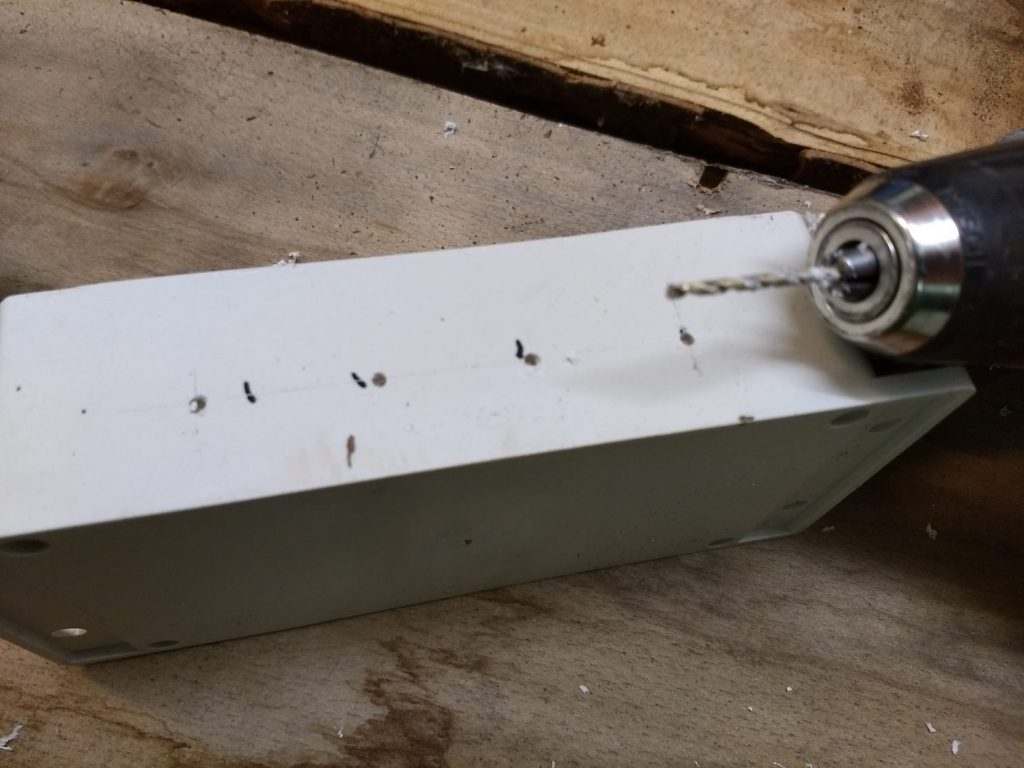
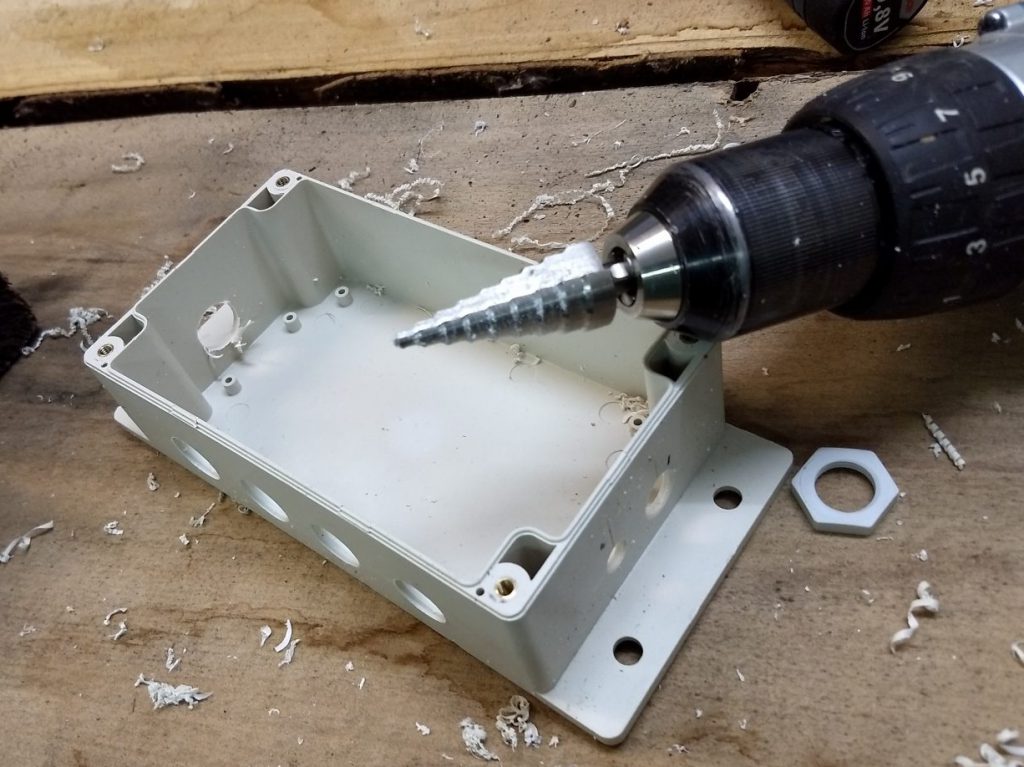
Drill the holes to final dimensions (8, 12, 16mm) using a 20mm step drill with slow speed.
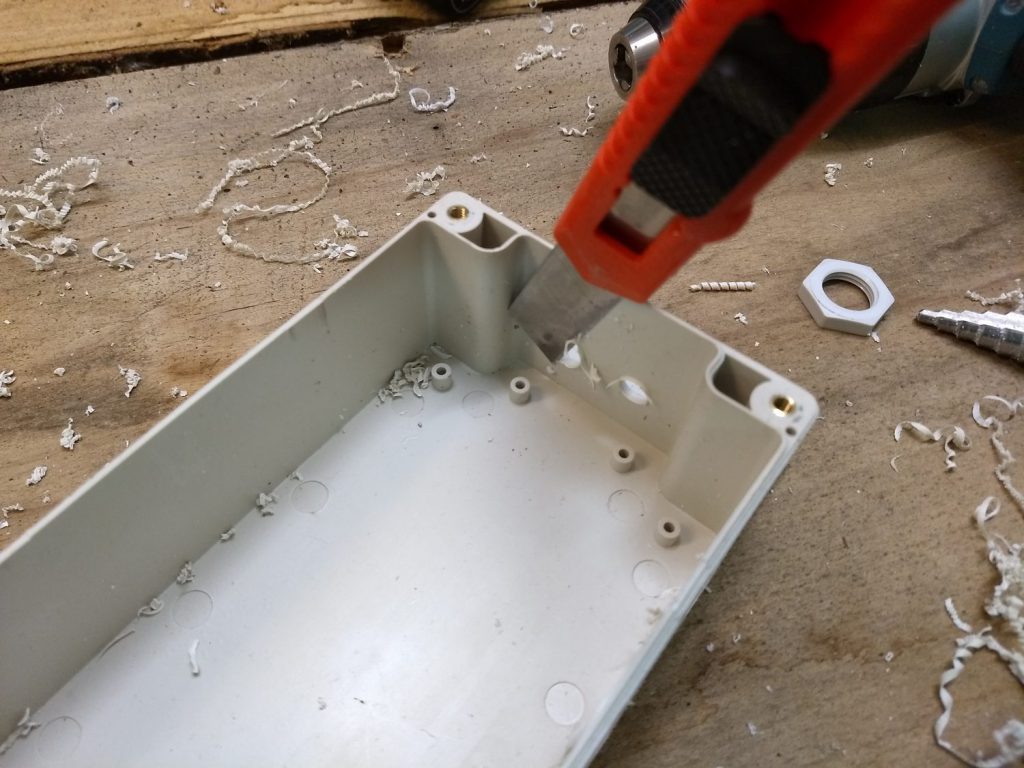
Then deburr the inside with a cutter knife.
Now the LED socket can be installed. Since the Grove plug does not fit through the 8mm hole, the 50cm Grove cable, which was cut in the middle before, must first be threaded in and then soldered to the LED (see picture). Do not forget to thread the fixing nut.
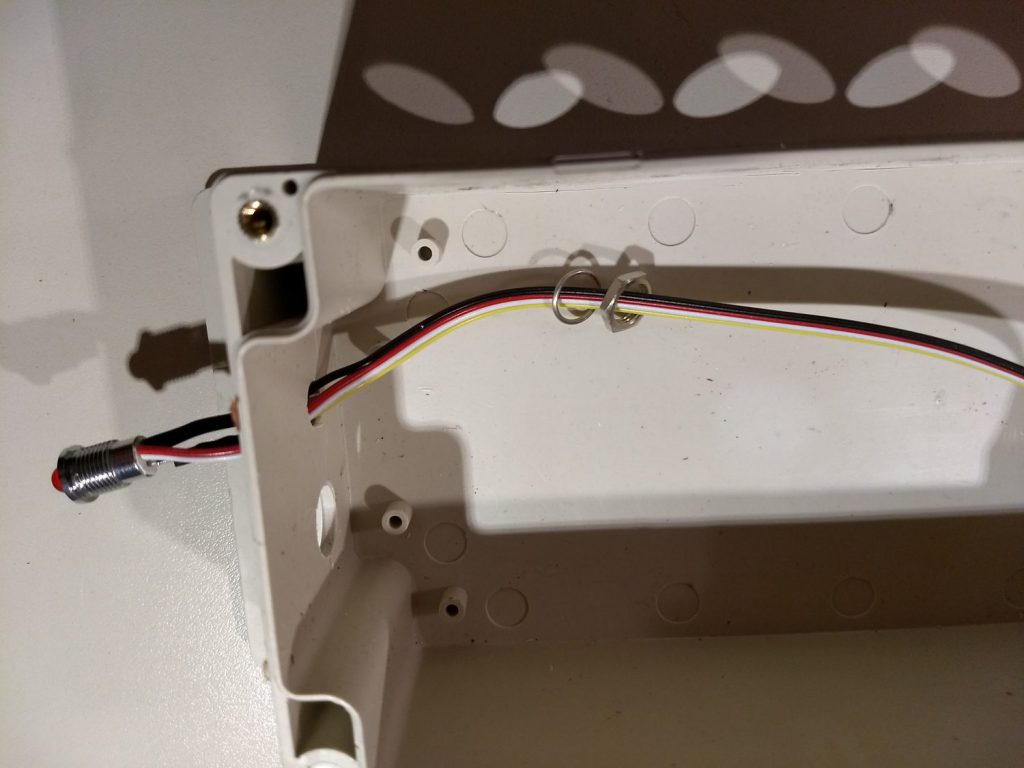
The black cable is soldered to the short leg of the LED. At the longer LED leg the yellow cable with 330 Ohm resistor and the whole mechanically stabilized and insulated with shrink tubing.
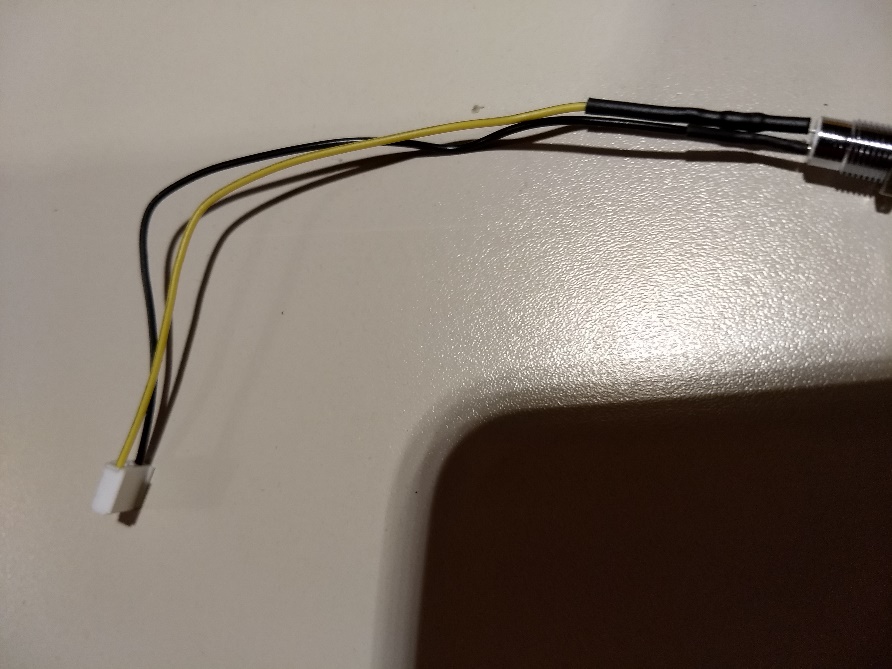
When it’s done, it’ll look that way.
Or if it looks like it, the threading into the housing has been forgotten before. You can also pull the pins out of the plug (lift the snap-in tabs slightly with a 1.5mm screwdriver) and put them back in again after threading.
So that everything holds well and also looks good, an 8mm shrink tubing (shrink rate 4:1) comes over everything again. This is so big that it fits over the Grove connector. I prefer the shrink tubing with hot glue coating inside. This keeps everything together after hot air shrinking.
Figure: 8mm shrink tubing (shrink ratio 4:1) fits over Grove connector
The button now has the same game:
The red and yellow wires are soldered to the button.
Possibly connect a 10k pull-down resistor from yellow (signal) to black (GND).
The whole can be pre-assembled individually and then mounted as an “assembly”, as the Grove connector fits through the 12mm (or 16mm for Sodial buttons) hole.
When tightening the plastic M16 cable glands, make sure that the locknuts are mounted correctly: One side is more round and the corners of the hexagon protrude slightly from the other side, so that they hold better in the housing. A hand tight is enough for tightening, as it’s quickly too much with the wrench.
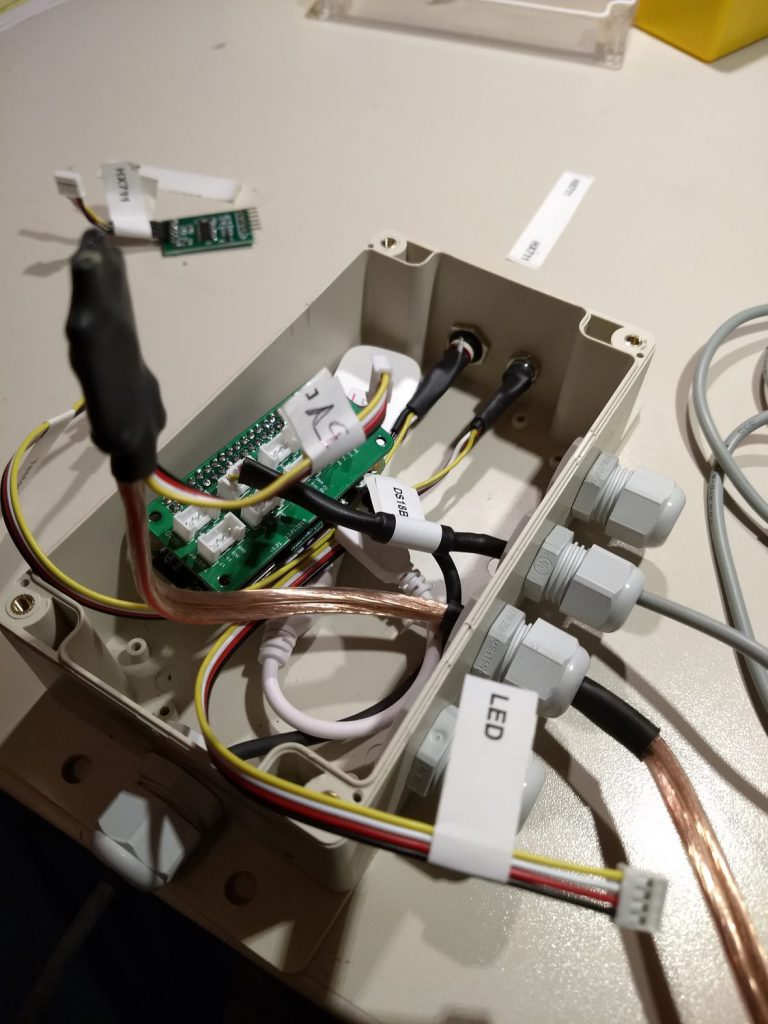
This is how it should look now:
Insert Raspberry Zero with UMTS stick as shown:
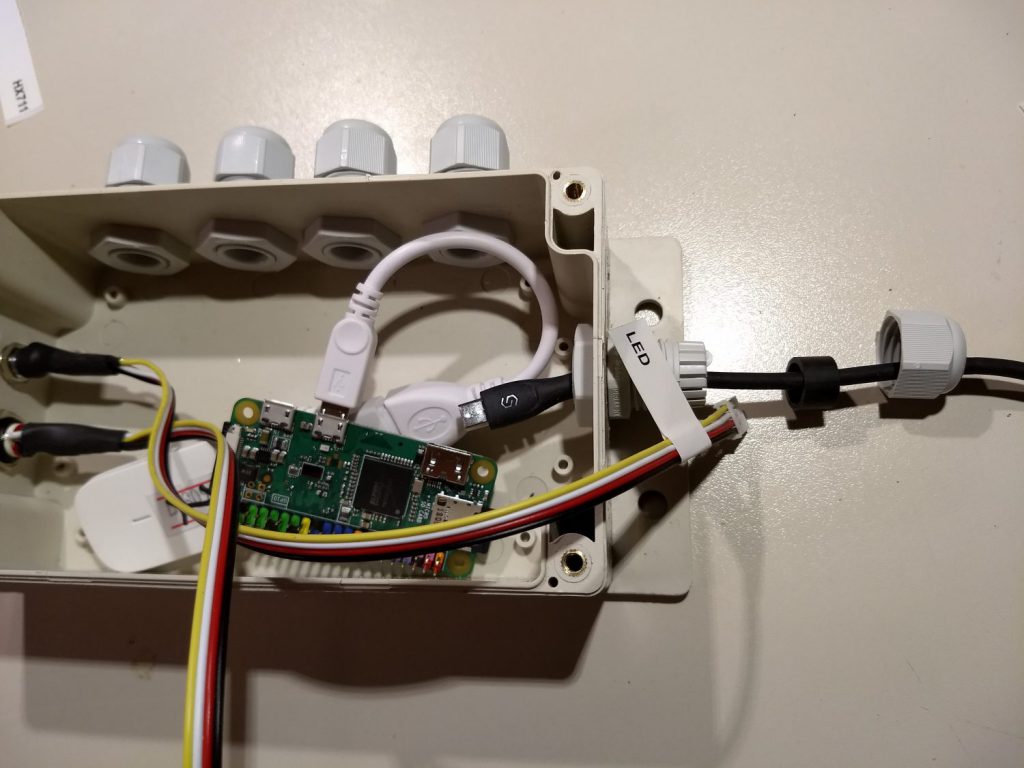
As Micro-USB cable I used the following type from Amazon (ca 6,€ for 2m): The sheath material of the cable is very high quality and should therefore survive some time in outdoor use and the Micro-USB plug is so small (or rounded) that it just fits through the hole of the cable gland. With solar power supply over 12V you can also do without this cable. It facilitates however the “table operation” and/or the start-up. A USB power supply unit is quicker to hand than a 12V power supply unit (correctly polarized and connected to loose cable ends).
Now the self-soldered Grove plug adapter LK is mounted on the Raspberry (information about this board in chapter 3).
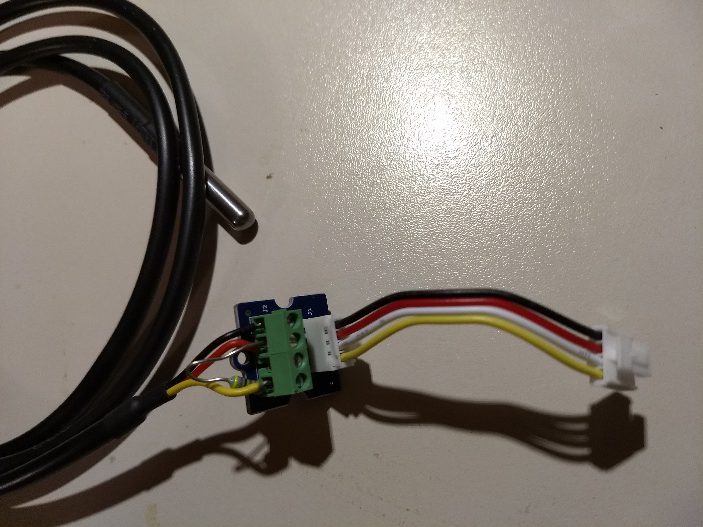
And the breeding chamber sensor DS18B20 is mounted:
The DS18B20 is available with integrated pull-up resistor and Grove plug and 2m cable for 7€ at Mouser.
Of course you can also solder the Grove plug and 4,7kOhm pull-up resistor to a 2€ sensor bought in China.
Or connect via a Grove screw terminal (Reichelt 3€).
Mouser also offers the BME680 sensor with Grove plug for about 19€. If you now still buy the HX711 with Grove plug (quite expensive with 15€), the AM2302 with Grove plug 9€, the Raspberry Zero W or an SD card there, then you don’t have to pay the steep shipping costs/minimum quantity surcharge (no shipping costs from 50€ value of goods (without VAT)).
Top: AM2302 with Grove plug 9€ from mouser.com
Below: Mouser BME680 sensor with Grove plug for approx. 19€
Now the cable with the 12V and the soldered 12V/5V DC/DC converter comes in (more about 12V/5V DC/DC converters in the chapter Solar Power Supply; only necessary for solar power supply).
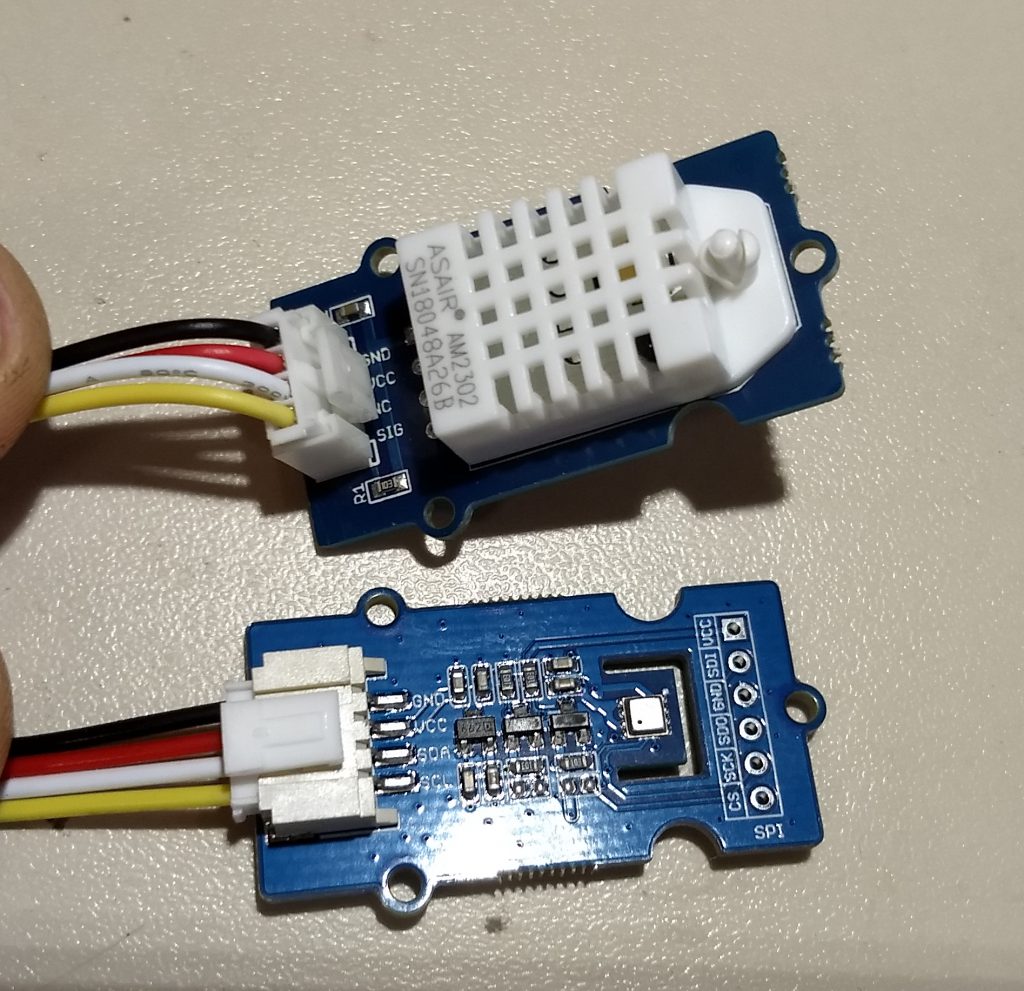
Finally I connected the outside temperature and humidity sensor. I chose the AM2320 (eBay from China 2,50€). Decision criterion: Useable case/super price-performance ratio.
An AM2302 is installed internally in the AM2320:
Attention the Am2320 has the Grove connector internally, but with a different assignment:

Left the standard Grove allocation, right the allocation of the AM2320.
=> So pin out the contacts from the connecting cable on one side and plug the wires into the socket in the AM2320 order.
If the housing of the sensor is open, the 4.7k pull-up resistor can be soldered into it.
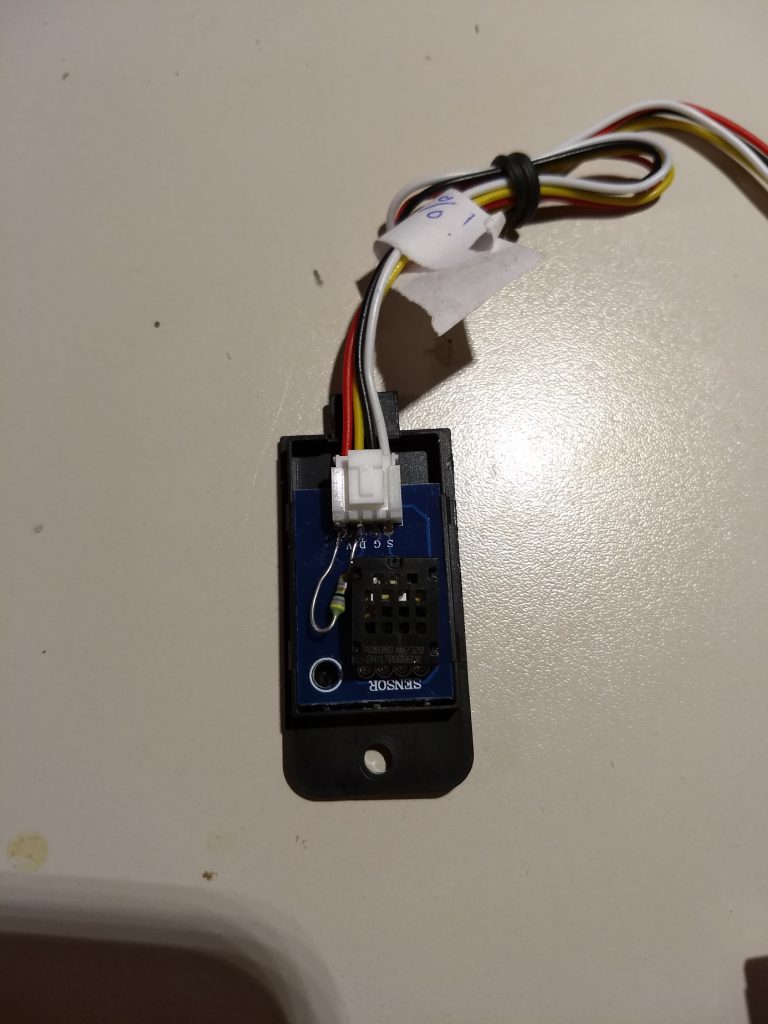
In the future I will solder a 10k 0805 SMD resistor here (see parts list).
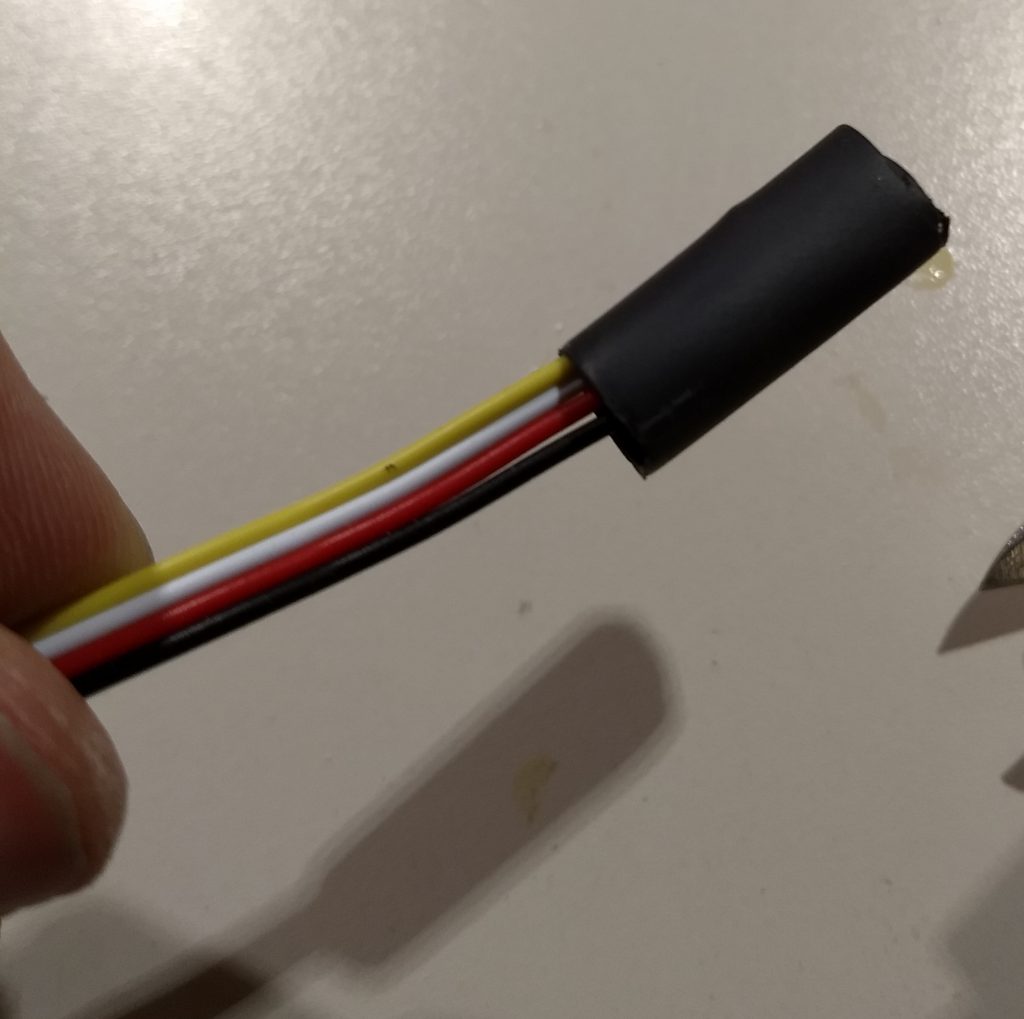
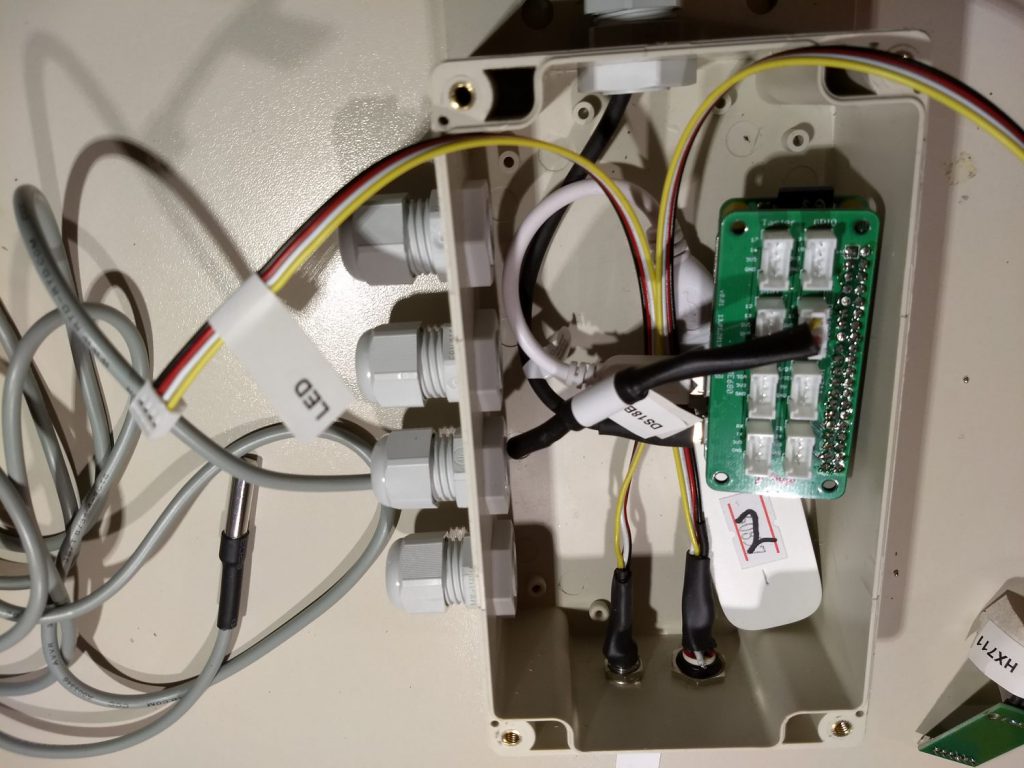
The last one is the HX711. Since the model with Grove plugs was too expensive for me (or I found it only too late…), I use the well-known 2€ model from Amazon; On the Rasperrry-Pi side a cut Grove cable soldered and with 19mm heat shrink tubing the PCB insulated.
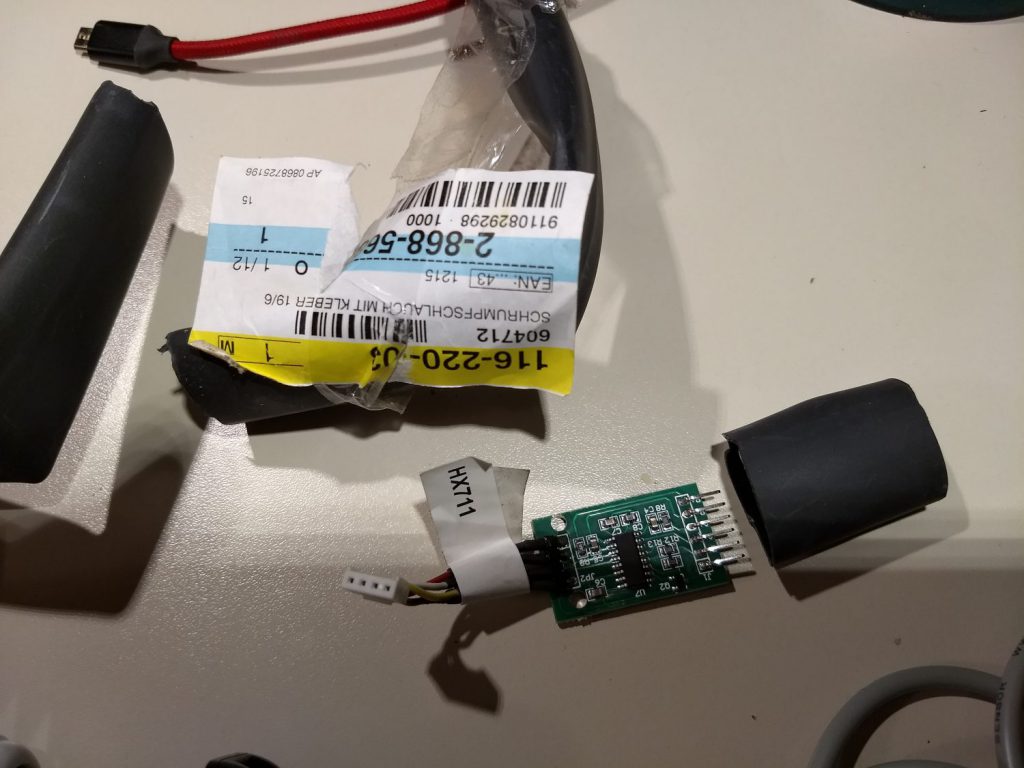
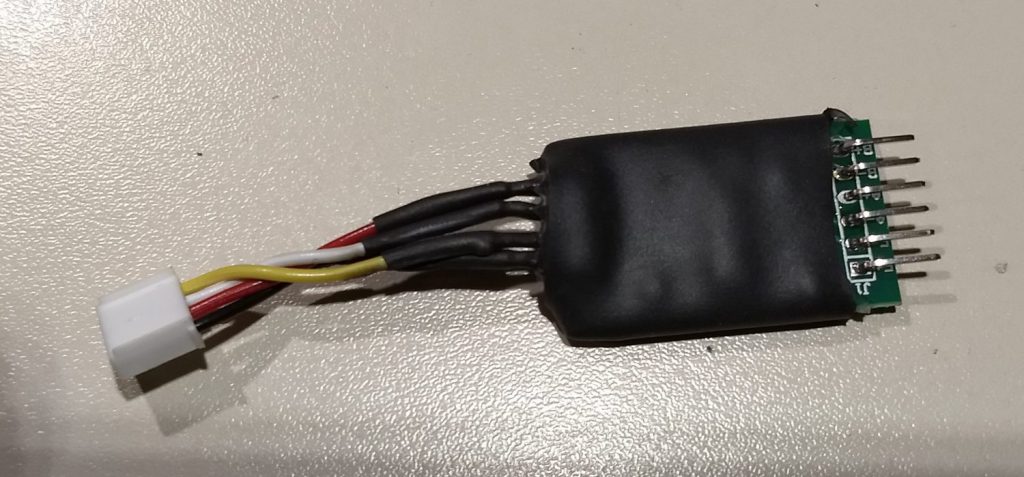
Alternative: HX711 board with Grove plug from Mouser (15€ but quite expensive).
To order from Mouser, see above.
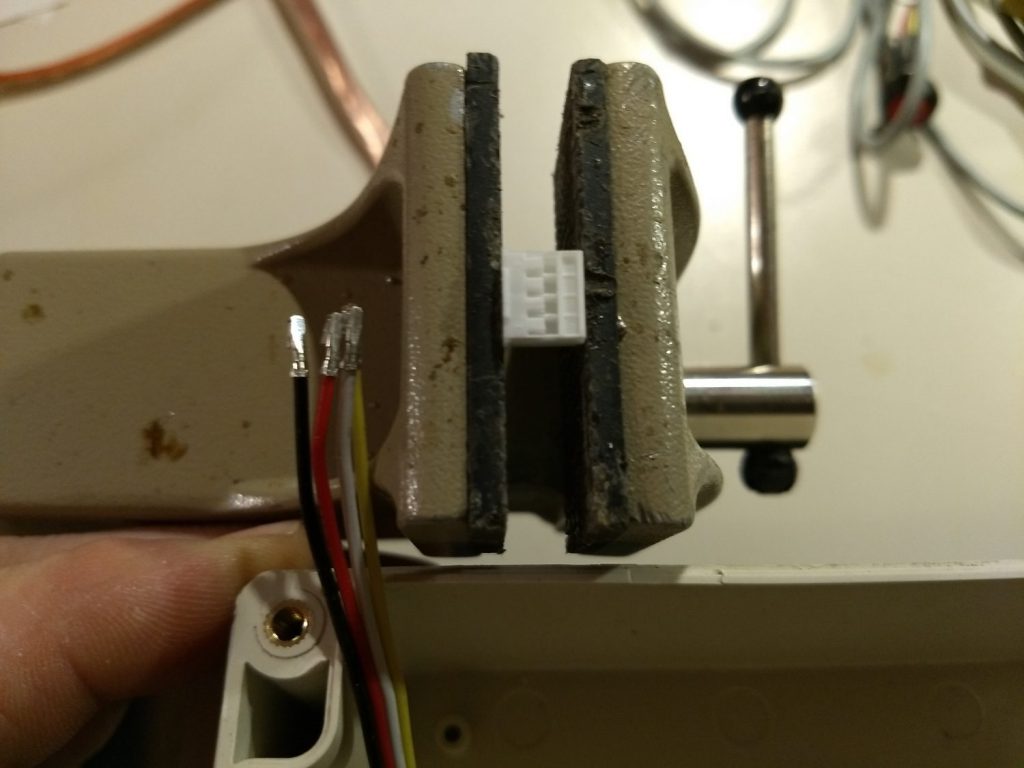
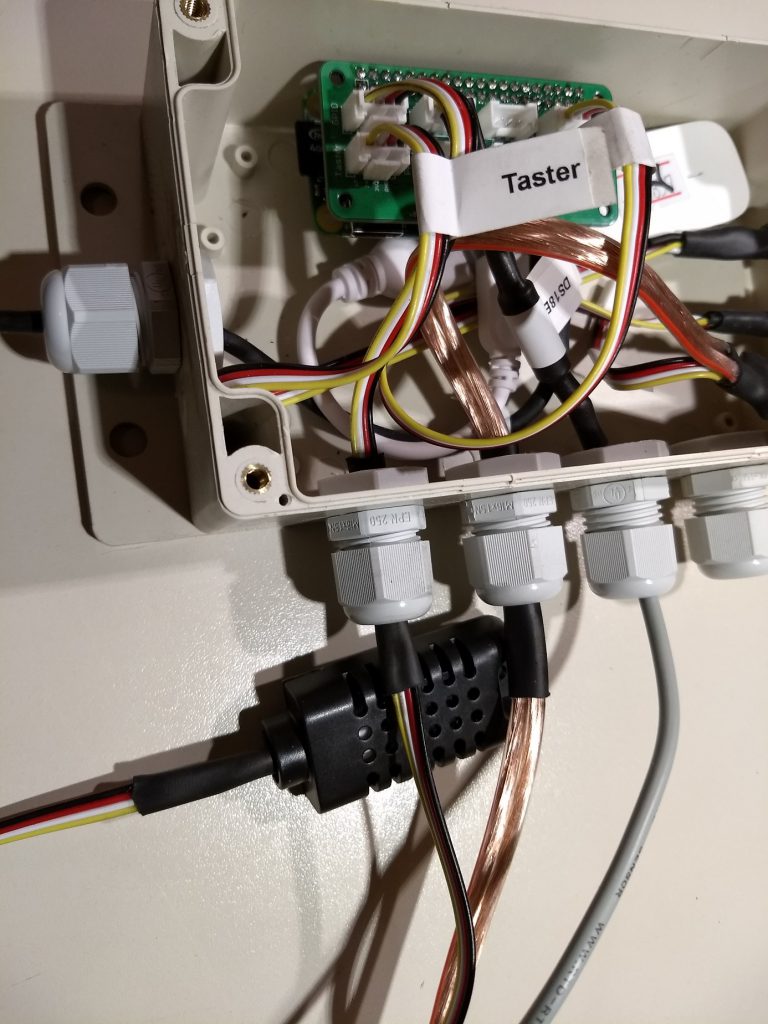
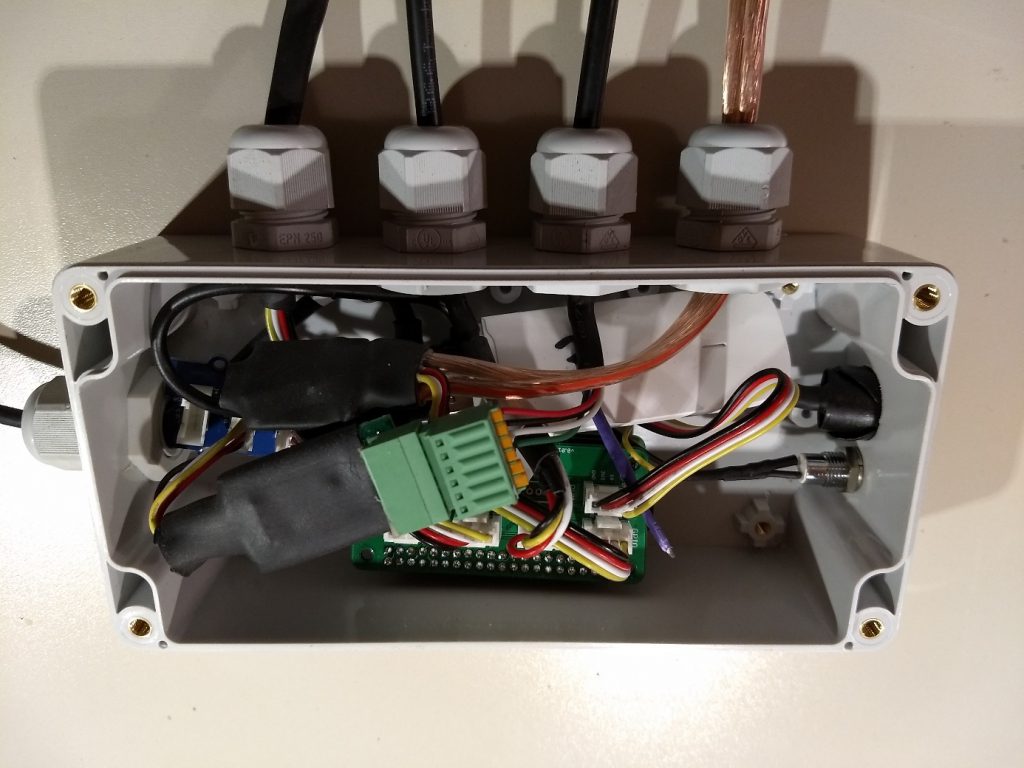
As soon as the scale section is finished, the cable from the load cell enters through the cable gland in which the pliers are currently inserted.
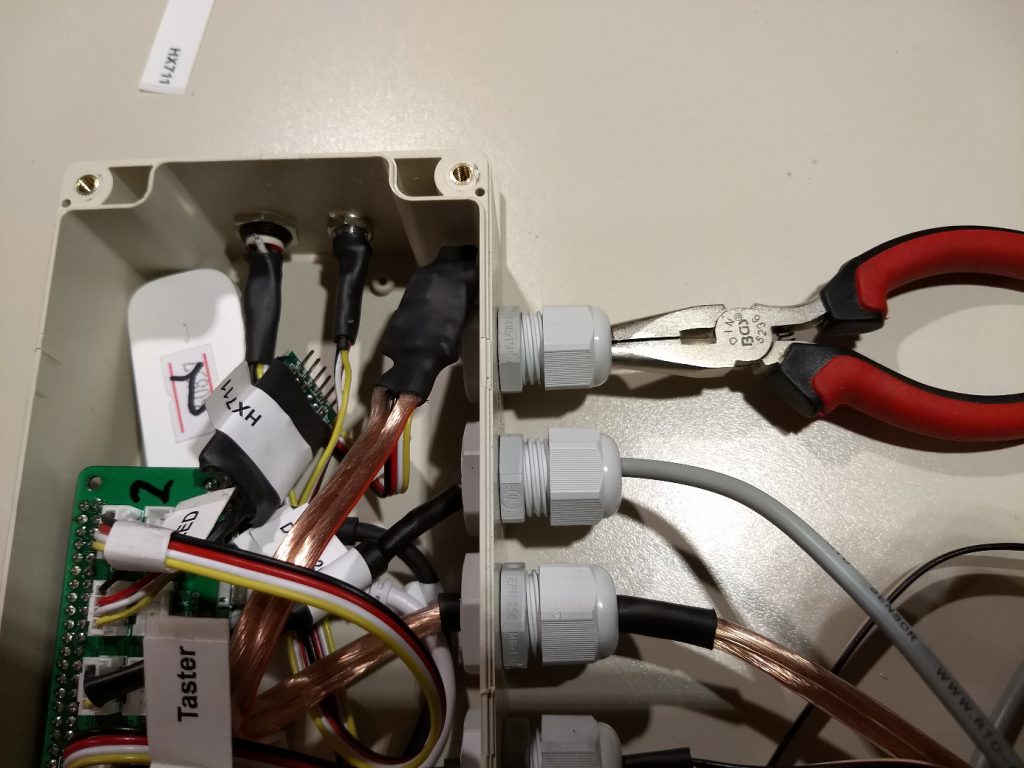
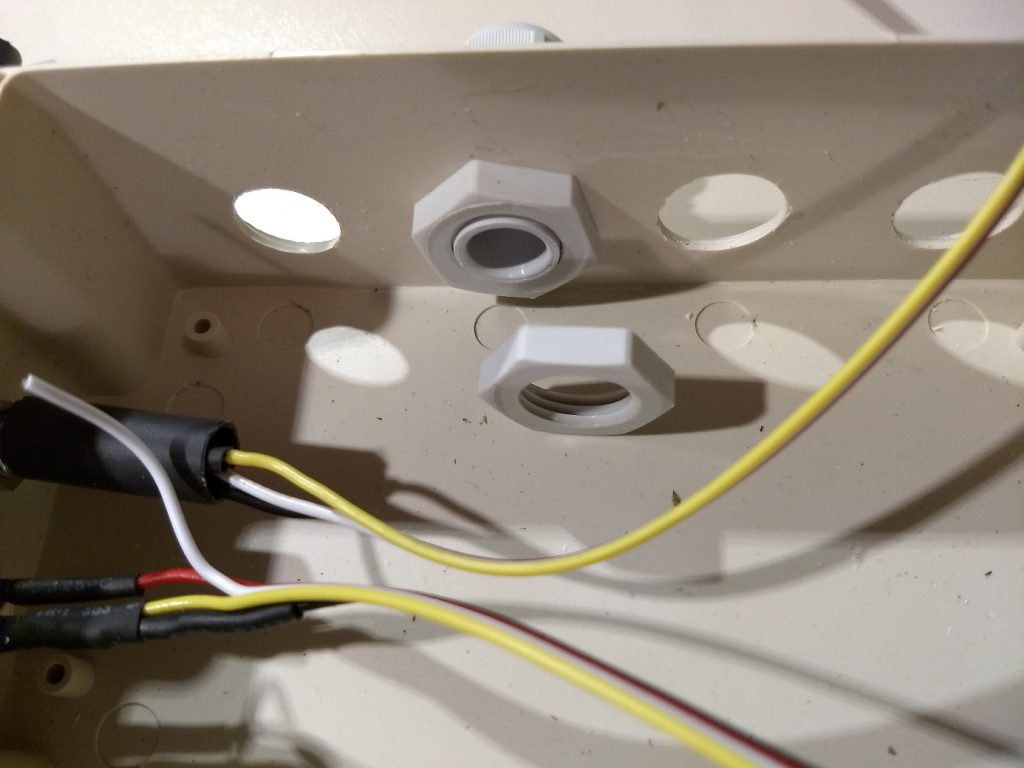
Picture before tightening the cable glands (again only hand-tight without tools).
I have reinforced each cable in the area of the cable gland with 8mm heat shrink tubing so that it is better clamped in the M16 cable glands.
Small cable bushings that fit better to the cables (e.g. M12) make little sense. Here the Grove plugs would not fit through.
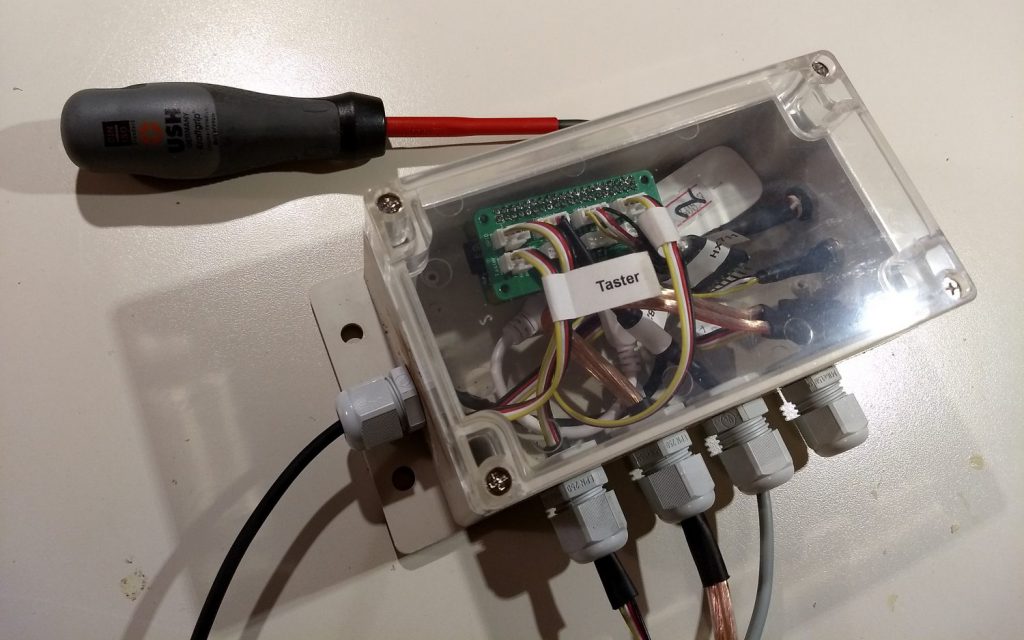
Screw on the lid and you’re done:
Alternative: Plastic housing
Had also tried the 10mm narrower Reichelt RND 455-00194 case (160 x 80 x 55 mm, IP65) (ca.7,50€), but it will be pretty tight.
But it also works if you don’t want to wait three weeks for the delivery of the bigger case from China):
Translated 19.10.2019 by JK

Hallo!
Ich habe zwei DHT22 und einen BME680 angeschlossen. Wie mache ich diese wetterfest? Bei meinen Sensoren liegen Anschlüsse und Platine frei (also Platine ohne Komplettgehäuse). Habt ihr DHT22 oder BME680 Sensoren, welche ein wetterfestes Gehäuse haben?
1. Einfach Schrumpfschlauch drüber? Bei der Luftfeuchtigkeit muss ja Luft ran. Also den Schrumpfschlauch beim Sensor ausschneiden? Das ist dann aber nicht richtig dicht. Mit Schrumpfschlauch kann ich nur die Anschlüsse abdichten, nicht die Platine.
2. Feuchtraumdose? Die Sensoren in Dosen mit Luftschlitzen (für die Luftfeuchtigkeit) verpacken. Komplett geschützt ist die Platine aber hier auch nicht.
P.S.: Habt ihr Erfahrung, wie die Bienen auf Sensoren (z. B. DS18b20) in ihrem Stock reagieren? Werden diese zugebaut? Wo sollte ich die Sensoren im Stock am besten platzieren?
Hi, ich habe letzten Winter je Beute einen DS18b20 Temperatursensor in die Mitte der Beute eingehangen und die Kabel über die Oberträger verlegt. Somit konnte ich schön, das Brutverhalten erkennen. Der Sensor wurde ganz leicht mit Wachs angebaut. Dies hat der Funktion aber keinerlei nachteile verpasst.
Grüße
Hey ich habe heute angefangen die ersten Teile zusammen zu bauen, ich bin soweit das die Temperatur und die luftfeuchtigkeit an thingspeak übertragen werden.
Die Temperatur wird wie gewollt schön im Diagramm in der App angezeigt.
Mein Problem ist die luftfeuchtigkeit diese wird nur der letzte Wert angezeigt, aber m Diagramme steht
Das keine Messdaten zur Verfügung stehen ♂️
Einfach noch ein bisschen warten bis noch mehr Daten bei ThingSpeak hochgeladen wurden.
Hey,
Könntet ihr erklären wo die SMD Widerstände angelötet werden müssen? Für den AM2320 und DS18B20?
Vielen Dank
Hallo Johannes,
die detaillierte Erklärung findest du hier: https://www.honey-pi.de/dht22-bzw-dht11-verwenden/
Viele Grüße
Javan
Hallo Javan,
Vielen Dank für deine Rückmeldung. Unter deinem Link wird zwar erklärt wie die Widerstände angelötet werden, aber nicht wie die SMD Widerstände auf dem JLCPCB Board angebracht werden. hierzu wurden ja mehrere Möglichkeiten auf dem Board geschaffen, aber ich weiß nicht wo und der SMD Widerstand aufgelötet werden muss. Muss hier dann eine Verbindung gekappt werden, sodass der Strom über den Widerstand fließt?
Vielen Dank und beste Grüße
Johannes